


Build Your own Ice Shack FREE plans |
If you follow these basic plans, you'll end up with a sturdy, functional ice fishing
shack. Adding ski supports, you could use an old pair of snow ski's or 2" x
4"/ 2" x 6" runners, allows it to be pulled behind a snowmobile or ATV. The first step is to place a 40" x 84" piece of 5/8" plywood on the floor. On one end of the plywood, screw down a 2" x 4" x 40". The back panel of the hut is fastened to this 2" x 4", to enable the front panel to lay flat with the back panel on top of it (see diagrams A and B). If you are adding skis, put them on now with 2" or 3" wood screws. |
Space the skis 20" apart and taper the front ends for easy towing (see diagrams C
and D). Next, take the remaining two sheets of plywood and mark 6'. Measure down
from this mark 20" in the centre of each sheet and tie a 20" piece of string
to a nail. Drive a nail into the mark on each panel; fasten the pencil and string
to this nail, and, holding the pencil, scribe an arc on the top of each panel
(see diagram F). Use a jig saw to cut out the arcs. Slide the off-cut plywood
down 3" or 4" under the cut panel and mark the radius. This curved piece of off-cut
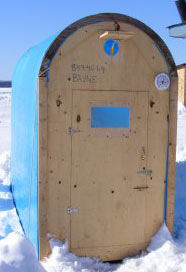
can be used later to attach the tarp. Next, measure a 2' x 4' doorway on the front and back panels, if two doors are required. Leave a 5" sill on the bottom to keep out blowing snow and retain plywood strength (see diagram G). Cut out the door(s) with a jig saw and re-attach with two hinges. A handle and latch completes the job. A small porthole can be cut at one or both ends for ventilation. |
If a heater is to be used, ventilation is a must to avoid a build-up of dangerous
carbon monoxide. Also, a small viewing hole at either end at eye level can be
cut out and covered with a piece of plastic or lexan. Now everything is ready to assemble. Using three hinges for each end panel, fasten them inside to the hut. To maintain an even height, keep the front and back panels flush with the bottom of the floor. Now add wire supports running from each corner of the front and back panels to the floor. They fold with the hut (see diagram E). The framework can now be erected and the ridge pole put in place at top. For added strength and comfort, two more ridge poles can be added at the sides, giving the angler a place to lean back and have a shelf in front of him. With the frame erected, apply the canvas or tarp. You might need a helping hand. If you wish, you can staple every 3" to 4" on the side panels and floor. A 3" or 4" plywood security strip on the front and back panels adds durability and strength. Now, cut openings in the plywood floor to the size of auger hole you intend to use. I prefer to make a 10" x 14" hinged rectangular opening and use a small barrel bolt to hold it closed. This prevents snow from entering while transporting the hut behind a snowmobile. The basic hut is now finished. A coat of paint, stain, or varnish on wooden parts helps preserve them. To transport the hut, just remove the ridge pole(s), fold the front panel, and then the back panel over the front panel (see diagram D). A small propane heater keeps the inside of the hut amazingly warm, especially if snow is banked up around the outside. Seating can be folding chairs or stools. Materials cost $100 to $200, depending on the quality of the covering and plywood you use. The hut is designed for years of use, so the initial cost of quality products is well justified. You could very easily modify the plans to accommodate a 4x8 size. Go fishing!!!! |
Basic Materials 3 sheets of 4' x 8' x 5/8" plywood (1/2" plywood can be used to keep weight down, but sturdiness suffers); 1 - heavy piece of canvas or poly tarp, approximately 8' x 15'; 1 - 2" x 2" x 7' ridge pole; 3 - 2" x 4" x 7' floor supports/skis (optional for towing); 10 - 3" hinges (three for each end piece, two for each door); 2 - handles per door; 2 - barrel bolts per door; 4 - 2" hinges for floor opening; assorted screws and heavy-duty staples. Optional Materials 2 - 4" eye bolts and rope for towing; 3 - 6" x 5/8" plywood ridge poles; desired paint, stain, or varnish. Tools needed Staple gun; jig saw; skill saw; screw gun; sharp knife; pencil and string; measuring tape |
7ft |
40" |
2x4 |
20" |
Rope |
Eye Bolts |
40" 2x4 |
Chain or wire support |
Hinge Floor |
3" or 4" strip of plywood |
6' |
6' |
ridge poll |
Tarp stapled to frame |
40" |
Door |
We will print out the plans for the ice shack and send them to you ASAP for just
$5.00 |